If you have an existing user directory, you can use SCIM to automatically provision users to your testmail.app organization. This allows you to manage users in your user directory and reflect those changes automatically in testmail.app.
This feature is only available for enterprise customers.
Setting up SCIM in testmail.app
Navigate to your console → Settings → SSO Configuration → Setup auto-provisioning of users using SCIM.
SAML SSO must be enabled to use SCIM for auto-provisioning.
After enabling SCIM, copy the SCIM API Key and use it to test the configuration on any Identity Provider (IdP) that supports SAML with SCIM. This API key will be required to authenticate and synchronize users between your IdP and testmail.app.
Setting up SCIM in your IdP
Different Identity Providers (IdP) have different process for setting up SCIM. This help guide covers the process of setting up SCIM for some popular IdPs.
Microsoft Entra ID (Azure AD)
If you are using Microsoft Entra ID (Azure Active Directory) to manage your organization, you can use SCIM to automatically provision users to testmail.app. The users will be synced from Azure to testmail.app (one-way) and granted access to your testmail.app organization.
Setup Enterprise Application
In order to provision users to testmail.app with Microsoft Entra ID, create an enterprise application.
If you are using SAML single sign-on along with SCIM, skip this section.
Sign in to your Azure account. Navigate to Microsoft Entra ID → Add → Enterprise Application.

Click on Create your own application. Enter a name for the application, select Integrate any other... and then click Create.
Setup SCIM Provisioning
Navigate to Provisioning tab of your application. Click on Connect your application on the Get started section.

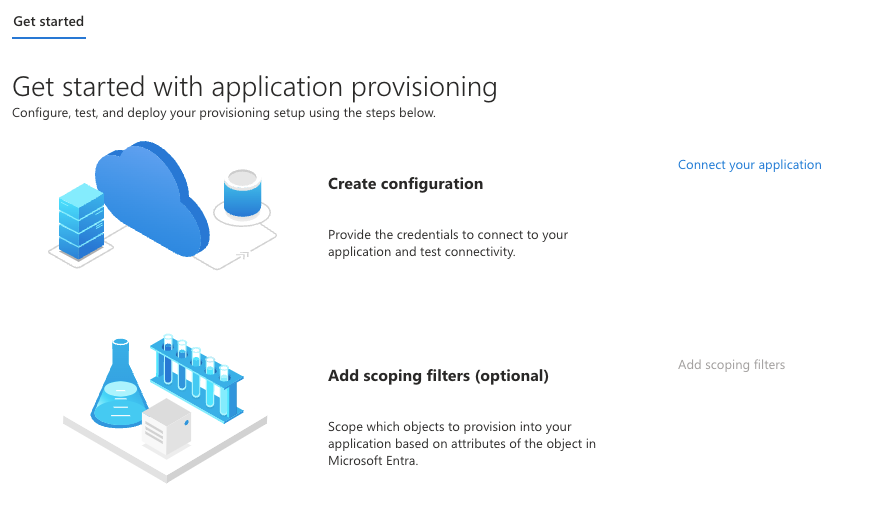
Configure the following settings to setup SCIM.
- Provisioning Mode
Select Automatic as the Provisioning Mode - Tenant URL
https://sso.testmail.app/scim/v2
- Secret Token
Paste the API Key

- Mappings
Navigate to Attribute mapping to synchronize the required user attributes and Click on Provision Microsoft Entra ID Users.

- Required attributes:
Remove mapping for all attributes except userName, and then click on Add New Mapping to add displayName, mail, and employeeType as required attributes. The employeeType attribute represents the role of the user in the organization on testmail.app and should be set to either "Member" or "Admin." If no role is provided, the user will be provisioned with the "Member" role by default. Refer to the screenshots below for the detailed configuration of these attributes.


- Set the Provisioning Status to on.

- Save the configuration
Okta
If you have Okta as your Identity Provider (IdP), you can use SCIM to automatically provision users to testmail.app, enabling them to access and manage your organization's resources seamlessly.
Setup SAML 2.0
An application with SAML 2.0 as the sign-in method is required in Okta to automatically provision users to testmail.app. Follow the steps in SSO with Okta to setup SAML 2.0 in Okta.
Enable SCIM Provisioning
- In Okta, navigate to Applications → Applications → Testmail App
- Select General tab and click on Edit available in App Settings
- Select Enable SCIM provisioning and click Save

SCIM Configuration
Select Provisioning tab and click Edit available in Integrations → SCIM Connection.
- SCIM connector base URL:
https://sso.testmail.app/scim/v2- Unique Identifier field for users:
userName- Supported provisioning actions:
Push New Users
Push Profile Updates- Authentication Mode:
HTTP Header
- Authorization:
Paste the API Key
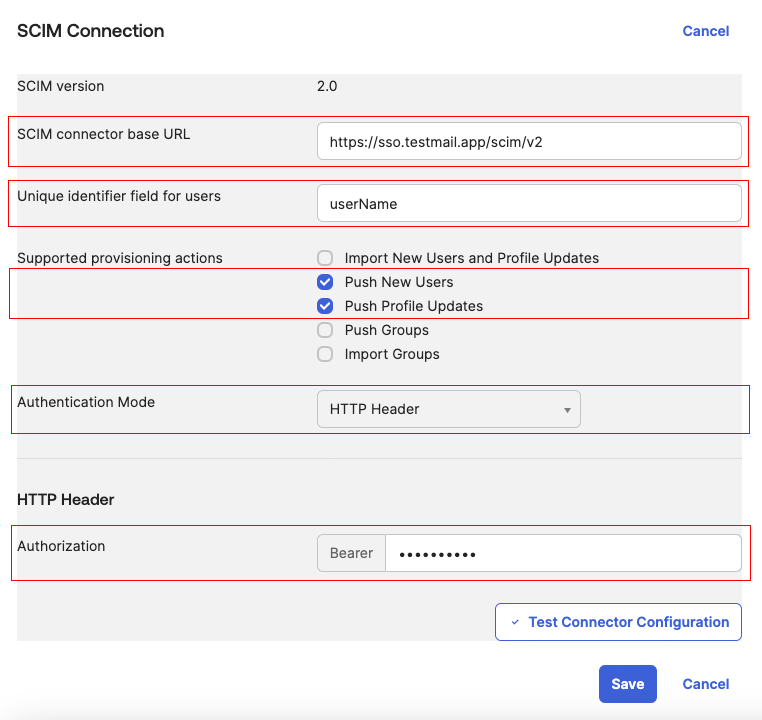
- Click Test Connector Configuration

- Click Save
To App Configuration
Select To App tab and click Edit available in Provisioning to App.
- Enable Create Users, Update User Attributes and Deactivate User
- Disable Sync Password
- Click Save

- Attribute Mappings:
- Required attributes:
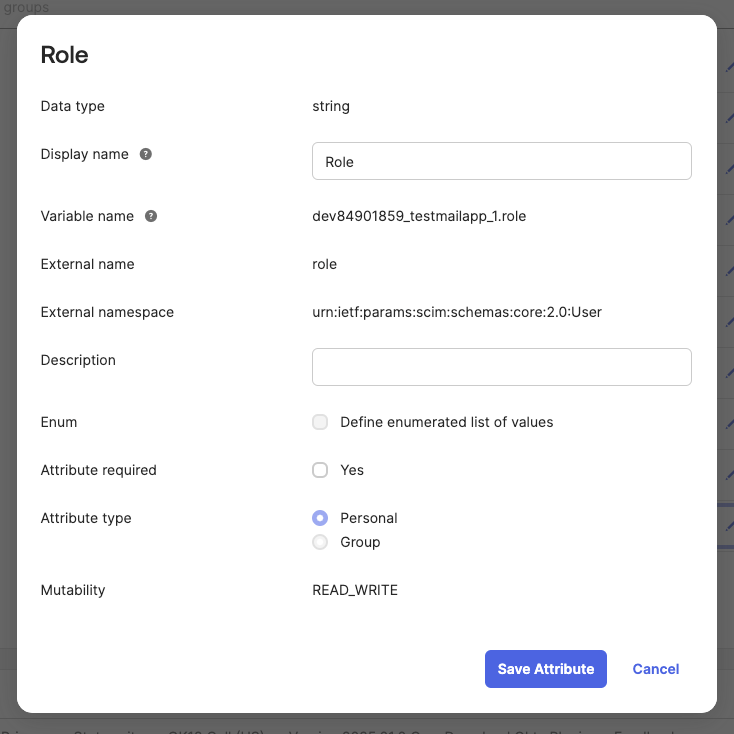
Disable mapping for all attributes except for userName. Go to Profile Editor and click on Add Attribute to create the required attributes. - The required attributes include email, name, and role, as depicted in the following screenshots with the configurations shown. Ensure that these attributes are mapped to the corresponding fields in the user's Okta profile.
- The role attribute represents the user's role in testmail.app and must be set to either "Member" or "Admin." If no role is provided, the user will be provisioned with the "Member" role by default.
- Required attributes:
Attribute names are case-sensitive, so ensure they are entered exactly as specified.


- Verify that all attributes have Create and Update under Apply On column.
Need help?
Please feel free to reach out at [email protected] for any help regarding SCIM for auto-provisioning of users.